Do you know Mohs?


So You Want to….
Buy a Head Loupe
by Ray Wilson
A magnifying head loupe is one of the most useful tools that you will buy when you commence your journey in lapidary or metalsmithing. A head loupe gives you improved vision of your work, showing up those annoying scratches that you thought were sanded out. A head loupe gives you the magnification necessary to see your work but leaves you with 2 hands free to hold and manipulate your work.
Head loupes need to be adjustable to fit different size heads and all models should come standard with this feature. The more substantial loupes will come with a knurled nut that is wound in or out to adjust the plastic head band. Some of the cheaper types will have Velcro straps that can be adjusted to the correct head size. Loupes typically will also move up and down to allow the user to lift the loupe away from the eyes when not in use. A nice feature that means you don’t have to take your loupe off of your head when not in use. Headbands can be plastic or leather covered. Leather bands are useful as a sweat band if working in the glare of strong lights or a hot soldering torch.
Loupes also come with different type of lenses and in different shapes. The more expensive varieties will have optical glass whereas the cheaper option will have acrylic lenses. Glass lenses are an advantage as they will not scratch as easy as the plastic ones.
Each manufacturer will decide what level of magnification to offer in the lens. Standard loupes will have a magnification of around 2.5X (2.5 times). With some brands, additional lenses of increased magnification are included and can be simply replaced by undoing a couple of threaded bolts. Remember that with each increasing level of magnification the focal point comes closer to your face. For example the commonly used Optivisor with a 2.5X lens has a focal length of around 200mm. A 3.5X lens has a focal length of 100mm.
Other features are also available from some manufacturers like an additional lens for one eye, effectively doubling the magnification for that lens. Often a light is also included.

Donegan Optivisor – Rio Grande
For many years the only head loupe in the market was a Donegan head loupe made in USA. These loupes are still the standard in head loupes and you will never go wrong buying a Donegan Optivisor. Recently though the weakening Australian dollar has meant that this loupe now retails for about $120 in Australia. Recently, like so many other tools, “knock offs” or copies, that are made in China, have appeared on the market. To all intents and purposes, they are an exact copy of an Optivisor in both design and functionality. In the favour of the copy is the price. These can be purchased in Australia for around $60 and come packaged with 4 different lenses. With Optivisor only 1 lens is provided but others can be purchased as required. If this is still too much for you a copy of the acrylic head loupe with Velcro straps is available for about $20.
Other models can be purchased from places like Kogan or Jaycar.


Tiltable LED Headband – Kogan LED Headband Loupe – Jaycar

Head Loupe with 4 Glass lenses – Gemcuts
A good head loupe will last a long time. I have just replaced my original Optivisor bought in 1998. After weighing up the options I went for the Chinese knock off from Gemcuts. I can’t fault it and at $60 including 4 optical glass lenses is a great option for my failing eyesight. Given that this investment will last you a long time, buy the best that you can afford at the time.
Rocks ‘n Minerals – Do you know the difference?
by Katarina Hayston
Being a member in the lapidary club means we are dealing with a lot of hard material, namely rocks. Their beauty lies in the eye of the beholder but most of them will get prettier the more you polish them.
But do you know whether you are holding a rock, a stone or a mineral?
I considered this on one of these self-isolation days and thought that there would be a simple explanation. Sure there is, but as usual the more you look the more answers you will find.
Let us start with “stone”. The general definition says that a Stone is piece of rock, made of hard compacted minerals, weathered to a smooth finish. Of course there are other definitions for stone, but none that apply to us here.
As we find both “rock” and “mineral” in the definition we can ignore “stone” from here on in as it is only a piece of what we are looking for.
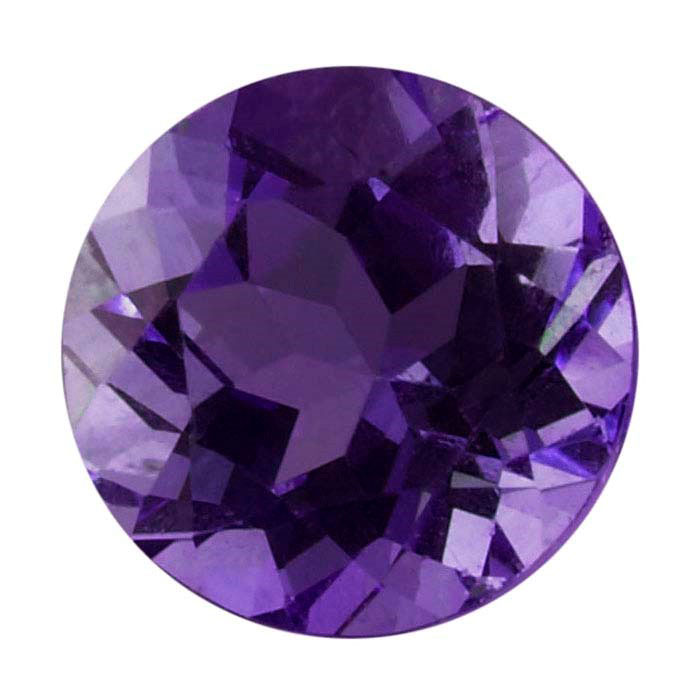
As the definition of stone tells us that “rock” is made of “minerals” we can deduce that “minerals have to be first in order to form rocks.
The definition for mineral says that it is a solid, naturally occurring inorganic substance. Diving deeper we find that a mineral is a solid formation that occurs naturally in the earth.
Furthermore, a mineral has a unique chemical composition and is defined by its crystalline structure and shape (usually, although some do not) and it is formed naturally by geological processes (Thank you Wikipedia).
They have definitive chemical makeup as they are always made up of the same materials in nearly the same proportions.
The most common mineral structure is silicate as they contain the most common elements found in the Earth’s crust: Silicon and Oxygen. Other elements such as aluminium, magnesium and such may be present in small quantities. The most common mineral know is Quartz.
Minerals are also defined through their physical properties, which most often than not are:
- Crystal structure: see below
- Hardness: on the Mohs scale, a ten-point scale running from the softest, talc to the hardest, diamond.
- Lustre: appearance in light
- Colour
- Streak: colour of a mineral when it has been ground to a fine powder. Often tested by rubbing the specimen on an unglazed plate.
- Cleavage: how mineral splits along various planes
- Fracture: how it breaks against its natural cleavage planes
- Specific gravity: density compared with water
- Any other properties (this one is my favourite)
Now that we have covered the basics of minerals we can turn to rocks.
Our stone definition has already told us that minerals are needed to form rocks. But in order for minerals to become rocks they have to be occurring naturally, in a solid combination.
Rocks are naturally occurring and coherent aggregate of one or more minerals.
Rocks are commonly divided into three major classes according to the processes that resulted in their formation. These classes are
(1) Igneous rocks, which have solidified from molten material called magma. Example: Basalt, Granite
(2) Sedimentary rocks, those consisting of fragments derived from pre-existing rocks or of materials precipitated from solutions. Example: Sandstone, gypsum, Opal (a siliceous sedimentary rock)
(3) Metamorphic rocks, which have been derived from either igneous or sedimentary rocks under conditions that caused changes in mineralogical composition, texture, and internal structure. Example: Slate and some marbles
These three classes, in turn, are subdivided into numerous groups and types on the basis of various factors, the most important of which are chemical, mineralogical, and textural attributes. And rocks can also contain organic matter, whereas minerals do not.
Maybe this helps to explain the mineral & rock situation:
Elements are needed to form Minerals. Depending on the quantity of each element present, the same elements may form different minerals.
One or more minerals (in this example all three minerals are needed) form rock under certain circumstances.
Inlaying Stone

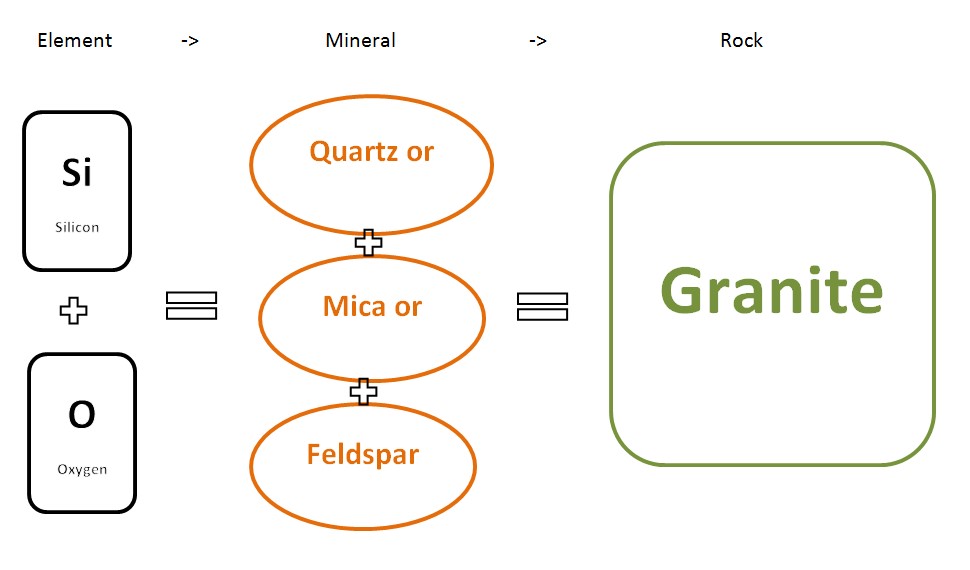
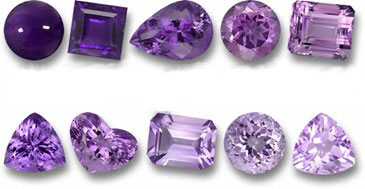
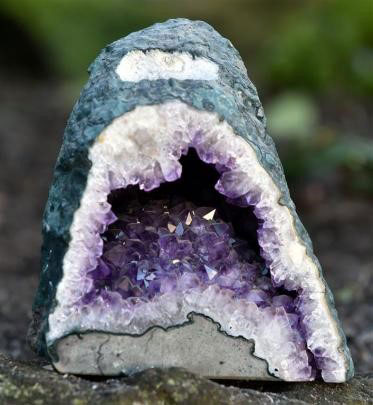
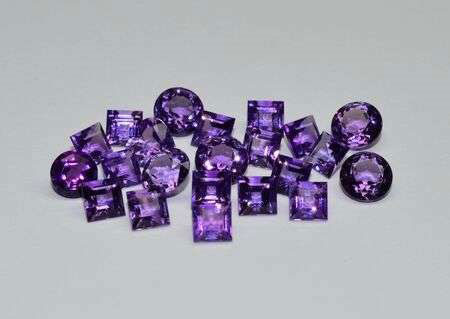
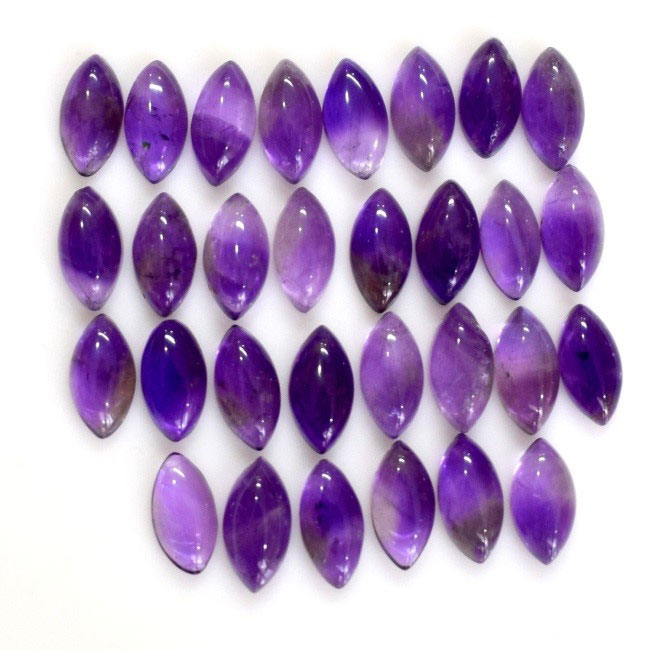
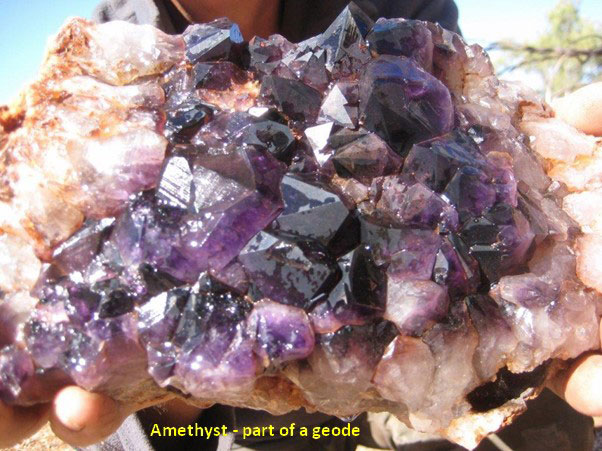
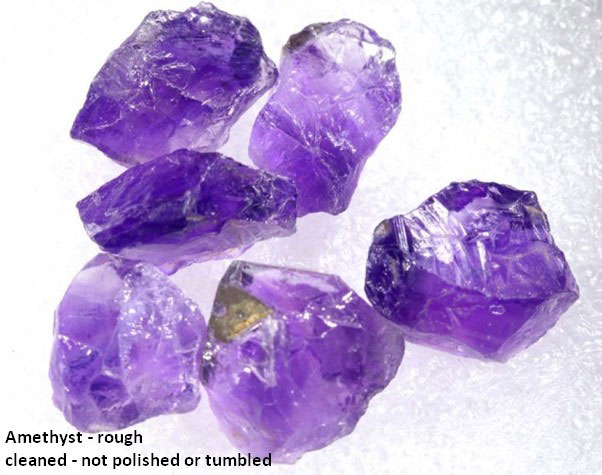
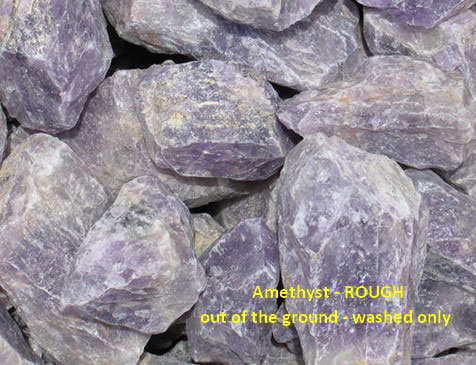
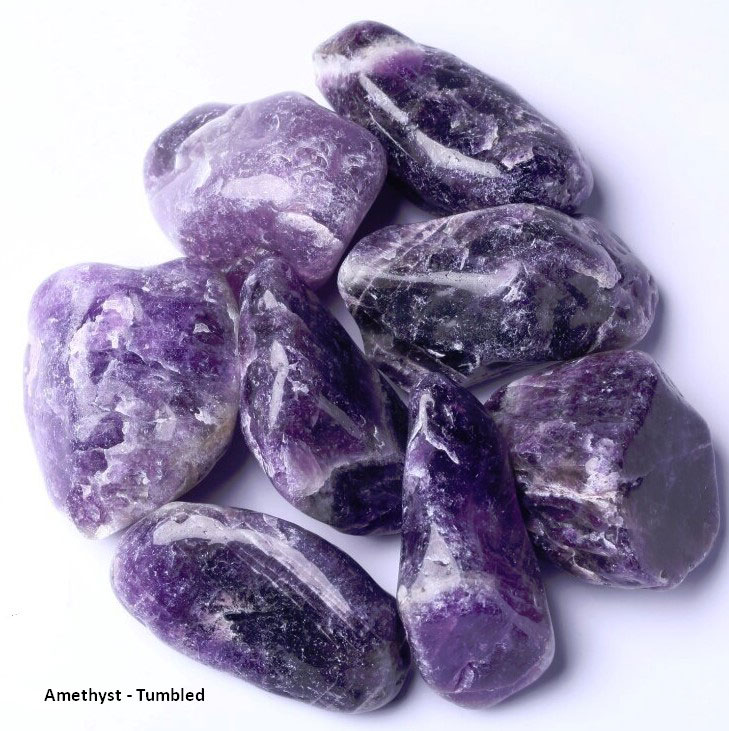
Amethyst

Show and Tell
by Ray Wilson

After a few failed starts and modifications to equipment aided by Ray Tierney and Tom Power I have now established a home casting workshop.
I have made silicon rubber moulds, made wax patterns from the moulds, and then invested the wax models in plaster investment followed by burning out the model and using a centrifuge caster to produce sterling silver jewellery pieces – a complete end to end process.
I have also been enjoying finishing off some boulder opal pieces; some of which were cut several months ago and were put aside.
This week I am going to have another attempt at making an inlay ring – challenged by Peter Smith. The You Tube video makes it look simple, but I have discovered a few secrets to stuffing up an apparently simple process. Peter is almost at the production stage now and has made up a special “dolly pot” to crush coloured rock to make the inlay. If anyone wants to try this challenge below is the You Tube link.
Polishing Rocks
8 Expert Tips on How to Polish Rocks
1. Grind wet. Always grind wet to protect your lungs from breathing in the dust from stone polishing. The dust from some stones, such as malachite, is quite toxic. In addition, wet grinding eliminates damage to expensive diamond wheels and stone-polishing tools.
2. Judge dry. Although we always grind wet, we recommend that you always dry the stone completely before judging its surface. Water on the stone surface will only hide scratches and give a false reading.
3. Use the whole wheel. Use the entire width of the grinding wheel, not just the centre. This will ensure a longer life and better performance for your diamond wheel.

3. Use the whole wheel. Use the entire width of the grinding wheel, not just the centre. This will ensure a longer life and better performance for your diamond wheel.
4. Skip no grit. Work sequentially from the coarsest to the finest grit. Don’t be tempted to take a short cut by skipping a grit in order to save a little time. The progression through finer and finer grits is necessary to remove the scratches left by the previous grit. The goal is to have the scratches become finer with each grit size until they can no longer be seen. Our experience has been that if you skip a grit, the final polish will show big scratches.
You will wonder where those scratches just came from! The truth is that they were there all the time, but you just didn’t sand them out when you were supposed to. If you skip a grit and find deep scratches, you’ll have to go back three or four grits to remove them. It’s always faster to do it right the first time than to try to take shortcuts and risk damaging the stone you’re working on.
5. Polish slow. Polishing is the final step. There are a myriad of polish and stone-polishing pad combinations; our preference is charging a soft leather pad with a thin paste of polishing compound and water. The actual polishing occurs as the pad starts to dry and the stone starts to pull against the surface. We keep the speed of the pad low to eliminate any heat buildup.
6. Keep it clean. Remember, “Cleanliness is next to Godliness” is especially important when it comes to lapidary work. To prevent cross-contamination from coarse grits, we are careful to rinse the stone and our hands at every grit change during stone polishing. We also thoroughly clean our machines after each grinding session to prevent contamination when moving through grit levels.
7. Believe what you see. Your eyes are your most important tools when it comes to stone polishing. They are your feedback loop. If your eyes tell you that something is not quite right about the surface, believe them. Stop! Figure out what the problem is before continuing, and think through the steps you’ll take to remedy it before you begin.
8. Grind a little and look a lot. This is the mantra of the successful lapidary. Taking your time and being very observant during the polishing process is essential to secure the results you want.