North Brisbane Lapidary Club

We Dig Rocks

  • Email
  • Facebook
  • Home
    • Activities
      • Gem Cutting
      • Fossicking
      • Metalsmithing
        • Beginner Silversmithing Projects
      • Gemmology
    • Membership
      • Constitution of the North Brisbane Lapidary Club Inc.
      • Costs and Fees
  • Visit Us
  • Gem Shows
    • QLACCA Gem Show Dates
    • Raffles & Prizes
    • Gem Shows Photo Gallery
    • Gem Show Dealers & Traders
  • News
    • Blog
      • Gem Show
      • Work Sessions Activity
      • Club event
      • Cabbing
      • Enamelling
      • Faceting
      • Fossiking
      • Metalsmithing
    • Newsletter Archive
  • Member’s Area
    • Calendar
      • My Bookings
    • Suppliers
    • Resources
    • Gems, Minerals and Rocks
    • Competitions
  • Log In
  • Log Out

Leaf Bracelet with Topaz

April 1, 2021 By Carol

by Thierry

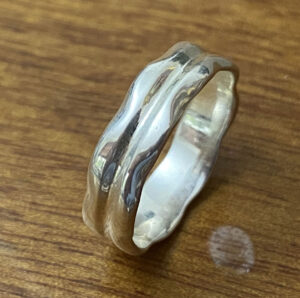
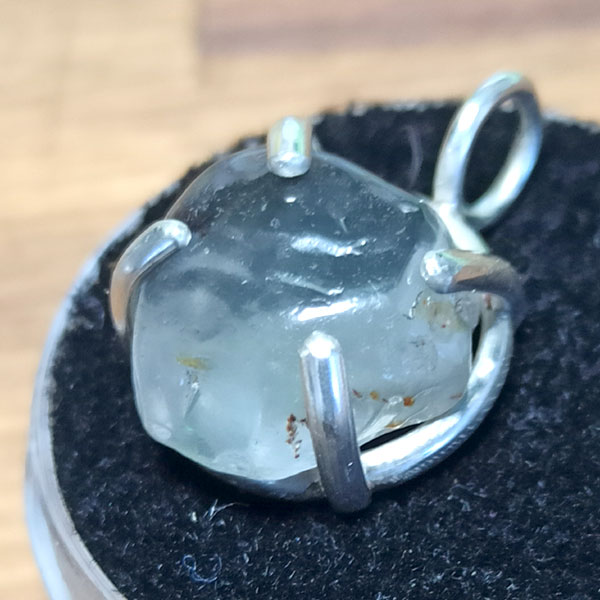
A Leaf Bracelet with a Topaz Gemstone – A last minute request from Bel, who wanted a bracelet made for her friend’s birthday. I chose to make a leaf bracelet as I have never done one before. So why make one, when you can make two for twice the price. The process is rather simple. Take a long strip of silver, fold it in half flat lengthwise, texture it with a hammer on both sides, then open it back up. An easy process in principle but neatly folding the strip is not straight forward; and texturing at an angle is challenging. I added a topaz gemstone to enlighten the piece. Not a bad result for a first attempt and I was very popular at the club, happily banging to my heart’s content.


Filed Under: Metalsmithing

Beginners Day February 2021

March 9, 2021 By Carol

Another successful beginners day in February with some positive feedback and positive results.

Filed Under: Cabbing, Metalsmithing, Work Sessions Activity

Work from one of our newest members

March 4, 2021 By Carol

Below are samples of what has been achieved by one of our newer members in one month at the club, amazing job Lisa, love the enthusiasm.


I made the bracelet first and have learnt some great techniques.  Would have embossed it a little bit heavier and there’s a couple of solder joints that annoy me but overall happy with the result.  Moved on to the other bracelet but extended it longer doing a single figure 8 and then a double link.  Haven’t added a closing clasp yet.  Might cut it and turn it into a couple of smaller bracelets or smaller necklace for my granddaughter.  Possibly a toggle end or S shape clasp ….. to be continued lol.  From the chain I got great experience with how much solder to use (don’t enjoy removing solder) and now feel confident soldering thinner gauge.   Made a quick ring with filing,  70% happy with that one.  Should have filed the middle line crisper only using the very end of the rats tail file.  Made mistake of using more of the file.   Not quite centred too.   Went home and did it after class.  We remember our mistakes.


Filed Under: Metalsmithing

Hinged Bracelet

February 25, 2021 By Carol

by Carol Money

Project 25 from Alan Revere’s “Professional Jewelry Making” Book

As many of you know I have been working my way through this book over the last couple of years. I have posted a few of the completed projects as I have finished them and a few of you will have seen me working on this latest one over the last few weeks.  These are my 2nd and 3rd hinges ever and I was really pleased with the way they turned out, although setting them up literally took hours.  The hardest part in the whole process was soldering on the small cap.  With lots of help from Fiona I practiced using the Smith Little Torch until I finally managed to solder the cap (we are talking about 15 to 20 attempts).

Filed Under: Metalsmithing

Metal Clay

January 21, 2021 By Carol

by Marie-Ann Coyle

Aussie Metal Clay is an Australian company and the owner Ros Bailey makes all the clays from silvers to base metals in many colours. Kim Booklass is the Senior Instructor, clay tester and clay designer. They have a web site and Facebook presence.

This is a different way of achieving an item in silver whether it is 99% or Sterling silver or Argentium 960 silver.

The silver particles which are in a fine dust are mixed with a clay binder to create a malleable clay.

The clay can be sculpted, rolled out, textured, moulded, stamped or many other ways to be used.

  • The Hummingbird pendant was cut out freehand. The clay was rolled to 3 cards thick (playing card thickness). I then cut and moulded the bird, flowers, and background. The pieces on the back and the bale were added when the front was dry.

The idea is to not let the clay dry too much but there is a wonderful product that AMC make called Clay Stay. This allows you to join pieces wet on wet, wet on dry and dry on dry.

The item must be completely dry and as this was a larger piece, I fired it in my jewellery kiln to the firing schedule for the 999 and my kiln settings.

  • The Frog pendant was made using the clay to push into a mould which is my own handmade mould, then adding the leaves, texturing the wood and adding the bale and pieces to the back.

I fired both these pieces at the same time with another pendant.

As each kiln is different it is recommended to make a test strip and fire to make sure it is fully sintered (silver hardness).

Smaller pieces can be torch fired but there is a specific method to do this.

This is a fairly simple explanation and if you want more information please go to their web site and look at the tutorials on offer. Press on the Australian Flag!


Filed Under: Metalsmithing

Mixed Pendants

December 31, 2020 By Carol

by Mary

Examples only – not perfect -we learn by doing!!

Split Pendant

Decorated Copper Pendant                                     with folded bail

Twisted Wire Pendant

Decorated Copper – fold forming, sweat soldered and disc cutting

Simple Circle Pendant

Fancy Bezel

Filed Under: Metalsmithing

Cuff Links for a birdwatcher

December 17, 2020 By Carol

by Carol Money

These cuff links were made for my brother-in-law’s 60th birthday (which was back in March 2020!) and are now ready to send (Dec 2020).  He is an avid bird watcher and photographer.

The inserts are enamelled using white powder as a base and then painted with enamel overglaze paints and fired again.  They represent day and night with a skylark and a barn owl.

The fastening devise is all hand fabricated using round wire put through the rolling mill, sawing to achieve good corners, soldering and rivets for the rotating piece.

Filed Under: Enamelling, Metalsmithing

Faceted Topaz

December 10, 2020 By Carol

by Brenda Honey

I have been mucking around with a friend’s rough topaz and have done two things. One piece I left rough and gave it a light skin polish, then mounted it in a silver basket which I made. I tried to make it look like a bloke could wear it on a black leather necklace. It looks a bit blue in one photo but it’s almost clear from the top.

The other I faceted and purchased a commercial setting for it. Yet again the photos do not capture the sparkle of the gem.

  • Photo 1 – working out the good from the ugly.
  • Photo 2 – pre forming.
  • Photo 3 – half way there.
  • Photo 4 – finished.

Filed Under: Faceting, Metalsmithing

Disc Bracelet

December 3, 2020 By Carol

by Mary


Material

  • 1mm square wire (twisted)
  • 5mm silver plate
  • Small pieces of copper
  • Disc cutting kit
  • Hole punch tool
  • Clasp (handmade toggle)

Steps

  • Using Disc cutting kit, cut 9 silver discs (varying sizes)
  • Mark and punch hole in each side of bracelet discs
  • Using Disc cutting kit, cut several small discs for decoration (silver, copper)
  • Clean and polish edges of discs
  • Sweat solder on decorative discs, stamp/hammer other discs as desired
  • Twist square silver wire, then anneal and make 18 jump ring (6mm mandrel)
  • Join discs with jump rings, and solder
  • Attach clasp
  • Clean and polish bracelet with emery paper, brass brush, polishing cloth

Filed Under: Club event, Metalsmithing

More Pendants

November 26, 2020 By Carol

by Mary

Just playing with what I have available!  The last pendant is an amethyst cabochon.

Materials

  • Silver plate (0.8mm thick)
  • Piece of silver for bail
  • Bezel (own choice)
  • Cabochon (own choice)

Steps

  • Measure and cut piece of silver plate, file and smooth edges and corners.
  • Add some design or stamping if desired. Stamp pendant back with ‘925’.
  • Cut a strip of silver for the bail, file and smooth edges. Anneal. Fold to form bail.

 (Consider bail size and the chain width to flow through it).

  • Using flat nose pliers to flatten and close bail ends ready for soldering. Apply flux and solder pieces to bail, and apply heat/solder.
  • Position the bail onto the centre back of the pendant.  Apply flux and solder pieces. Solder applying heat to top side of pendant.
  • Wrap bezel around the cabochon, mark bezel. Check length and cut. (Allow a little extra, adjustments can be made as you fit it tightly around cabochon).
  • Match bezel ends, place solder pieces around inside of shaped bezel. Apply heat on the outside of bezel, watch it flow. Reshape bezel and fit cabochon inside it. Check height of bezel. If bezel is too high file some off the bottom.
  • Position bezel on the pendant plate, ensuring it sits flat/flush.
  • Apply flux and solder pieces to the inside of the bezel. Apply heat around the outside and watch solder flow. Check bezel has totally attached to the pendant plate.
  • Clean and polish pendant. Put cabochon into bezel, ensuring it sits in evenly.
  • Using square end pusher tool, start to fold bezel over the cabochon, start at top and bottom, then each side (NSEW) evenly. Then carefully fold remaining bezel onto cabochon. Can use a burnisher tool to ensure bezel sits firmly onto the cabochon.
  • Give final clean and polish.

Square End Pusher
Burnisher

Filed Under: Cabbing, Metalsmithing

  • « Previous Page
  • 1
  • 2
  • 3
  • 4
  • …
  • 6
  • Next Page »

Copyright 2014 · Website Design Brisbane

Insert/edit link

Enter the destination URL

Or link to existing content

    No search term specified. Showing recent items. Search or use up and down arrow keys to select an item.