North Brisbane Lapidary Club

We Dig Rocks

  • Email
  • Facebook
  • Home
    • Activities
      • Gem Cutting
      • Fossicking
      • Metalsmithing
        • Beginner Silversmithing Projects
      • Gemmology
    • Membership
      • Constitution of the North Brisbane Lapidary Club Inc.
      • Costs and Fees
  • Visit Us
  • Gem Shows
    • QLACCA Gem Show Dates
    • Raffles & Prizes
    • Gem Shows Photo Gallery
    • Gem Show Dealers & Traders
  • News
    • Blog
      • Gem Show
      • Work Sessions Activity
      • Club event
      • Cabbing
      • Enamelling
      • Faceting
      • Fossiking
      • Metalsmithing
    • Newsletter Archive
  • Member’s Area
    • Calendar
      • My Bookings
    • Suppliers
    • Resources
    • Gems, Minerals and Rocks
    • Competitions
  • Log In
  • Log Out

Broom Casting and adding patina

August 6, 2020 By Carol

by Fiona Watts

A lot of us have done broom casting at the club and I for one had a lot of fun. It’s so addictive, I think we have all done quite a few ‘pours’ and most of us have gotten some really good results. But what can you make from the end results?

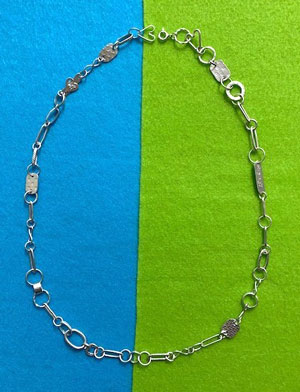
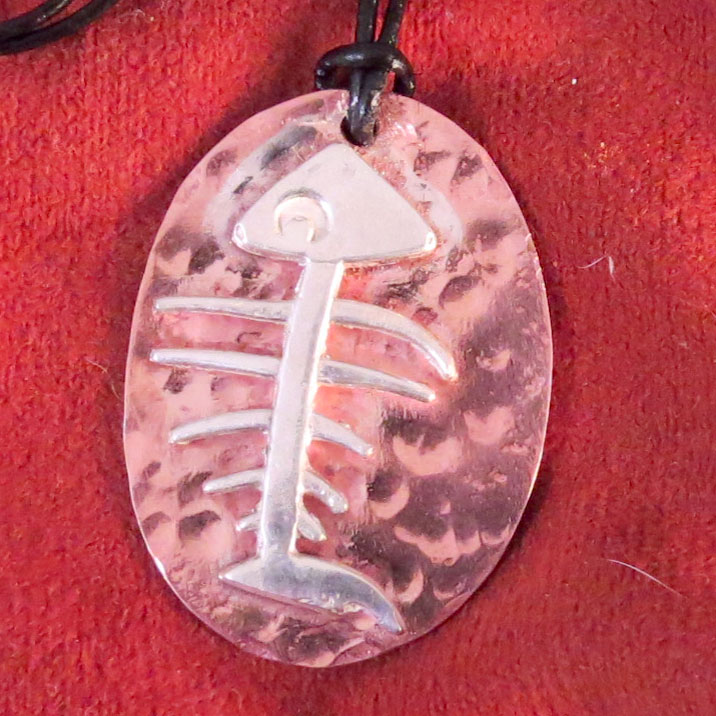
I’ve made a couple of pendants (how many can one person wear though right!?!?), some earrings and STILL have some great looking broom castings left over.

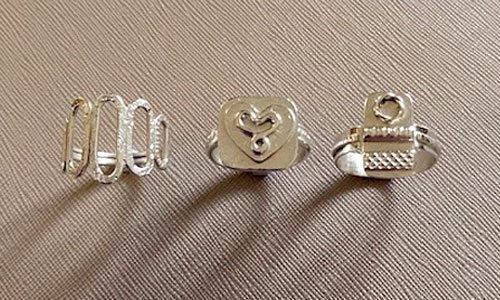
The photo is of the same pendant, just showing different sides…..

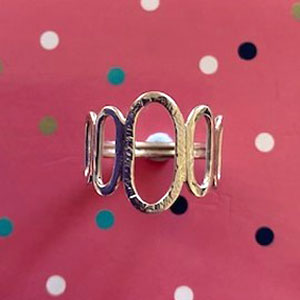
So I thought about what else I could make and one piece really lent itself to a ring.

First I made a plain, simple ring shank or band. Then annealed the casting piece. And VERY CAREFULLY bent it little by little into a crescent shape. Carefully, as I didn’t want to mar the silver or damage the design. Annealed several times while bending.

Once it was kind of the shape and size I wanted, I made the ring shank the same shape as the casting using pliers. Like matching a bezel to a stone.

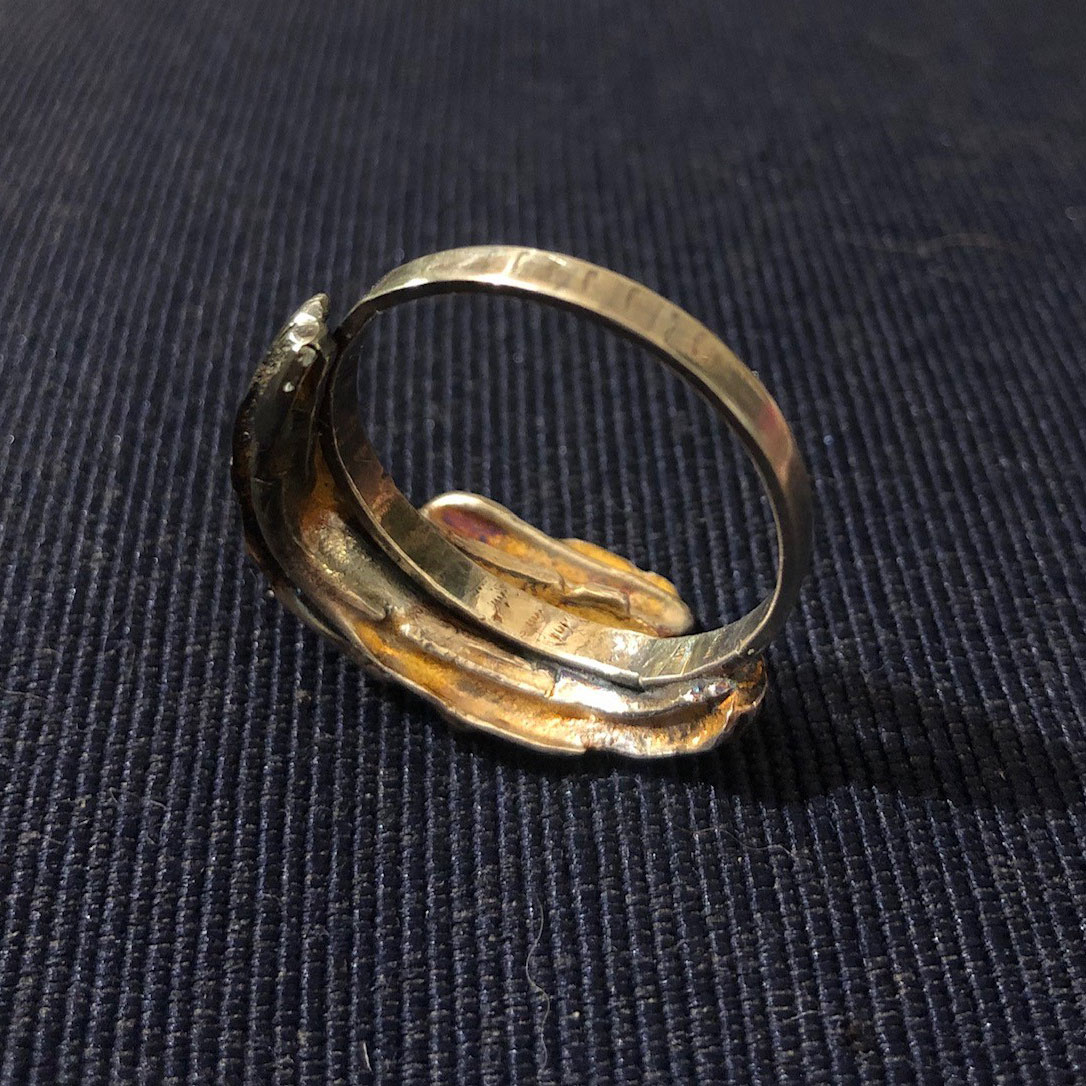
Then much to Carol M’s dismay, used a small butane torch to solder it together. She didn’t believe I could solder such a ‘large’ piece of silver with a small torch.

Success!

It’s kind of all about confidence and experience I guess.

Sorry I forgot to take progress shots.

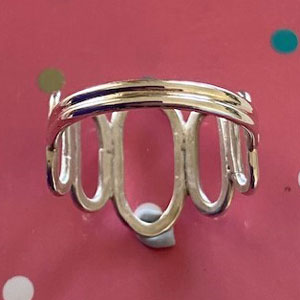
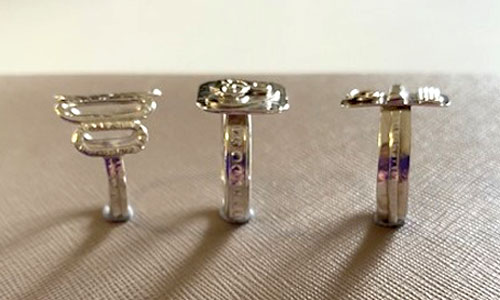
As most of you know, I’m a patina girl. Love, love, love patinas.

And look what groovy colours I got!

Keep creating. And smiling.

Fiona

Filed Under: Metalsmithing

A Random Necklace from can you guess who?

July 30, 2020 By Carol

by Mary Lancaster

A necklace made using a variety of remnant links/jump rings. Somewhat eclectic!

Filed Under: Metalsmithing

More homework

July 15, 2020 By Carol

by Lola

Not only has Lola been busy with her usual baking and jam making, below are some fine examples of her work in silver.

The pendant with the rings was made from recycled jewellery.

Filed Under: Metalsmithing

Sweat Soldering

July 9, 2020 By Carol

by Ray Wilson

Sweat soldering is a simple process that can be used to create depth, texture or contrast to your work.

Solder is applied to the back of the piece that is going to be the top of the finished item. It is cleaned and positioned on the back plate and the complete piece is then reheated until the solder flows between the 2 pieces.  The surfaces of course have to be flat and free of grease.

Here’s a piece I have just completed.

Filed Under: Metalsmithing

Silver Loop Ring

July 9, 2020 By Carol

by Mary Lancaster

Materials

  • 1.5mm round silver wire

Steps

  • Make jump rings: 1 x 9.75 mm mandrel, 2 x 8.5 mm mandrel, 2 x 6.0 mm mandrel
  • Solder and pull into oval shape, use flat-nose pliers to level sides of ovals
  • Hammer each jump ring
  • Use file to flatten sides of jump rings ready to join
  • Solder two medium-sized jump rings to larger jump ring
  • Solder two smaller jump rings onto each side
  • Shape to form top of ring
  • Cut two approximate lengths of round silver wire to make shank of ring
  • Solder two lengths together (tie each end together with wire to hold)
  • Measure shank for correct size to form ring, file ends flat ready for soldering
  • Solder one end of shank to ring top (easier to place in hole in firebrick)
  • Gently shape shank and solder other side to ring top
  • Use ring mandrel and nylon hammer to reshape finished ring
  • Use file and emery paper to clean
  • Final clean with brass brush
  • Polish

Other rings made with ‘odds and ends’ of silver.

Filed Under: Metalsmithing

Silver Ring

July 2, 2020 By Carol

by Brenda Honey

Here is another project I have been working on for several weeks. You know…. Do a bit then think about how you will do better in the next step. It turned out well on one side but the other side has a bit too much solder. Will have to think harder next time.

Shows I was listening to my instructors so a big thank you to all of them.

Filed Under: Metalsmithing

Heart Bracelet

June 25, 2020 By Carol

by Mary Lancaster

Material

  • 8 large hearts (5cm length of 1mm round silver wire)
  • 8 small hearts (2.5cm length of 1mm round silver wire)
  • 31 round joining jump rings (1mm round wire, 2.9mm mandrel)
  • 1 clasp
  • All joins silver soldered

Making a simple heart

Cut silver & fold in half

Use round-nose pliers to form heart curve

Form second heart curve & close curves

Solder join. Use small file, emery paper making solder seamless.

Round-nose pliers

Hearts can be joint at top or bottom. Hearts can vary in design and size, just create your own form. Make a bracelet

Filed Under: Metalsmithing

So You Want to….

June 19, 2020 By Carol

Buy a Head Loupe

by Ray Wilson

A magnifying head loupe is one of the most useful tools that you will buy when you commence your journey in lapidary or metalsmithing.  A head loupe gives you improved vision of your work, showing up those annoying scratches that you thought were sanded out.  A head loupe gives you the magnification necessary to see your work but leaves you with 2 hands free to hold and manipulate your work.

Head loupes need to be adjustable to fit different size heads and all models should come standard with this feature.  The more substantial loupes will come with a knurled nut that is wound in or out to adjust the plastic head band.  Some of the cheaper types will have Velcro straps that can be adjusted to the correct head size.  Loupes typically will also move up and down to allow the user to lift the loupe away from the eyes when not in use.  A nice feature that means you don’t have to take your loupe off of your head when not in use. Headbands can be plastic or leather covered.  Leather bands are useful as a sweat band if working in the glare of strong lights or a hot soldering torch.

Loupes also come with different type of lenses and in different shapes.  The more expensive varieties will have optical glass whereas the cheaper option will have acrylic lenses.  Glass lenses are an advantage as they will not scratch as easy as the plastic ones.

Each manufacturer will decide what level of magnification to offer in the lens.  Standard loupes will have a magnification of around 2.5X (2.5 times).  With some brands, additional lenses of increased magnification are included and can be simply replaced by undoing a couple of threaded bolts.  Remember that with each increasing level of magnification the focal point comes closer to your face.  For example the commonly used Optivisor with a 2.5X lens has a focal length of around 200mm.  A 3.5X lens has a focal length of 100mm.

Other features are also available from some manufacturers like an additional lens for one eye, effectively doubling the magnification for that lens.  Often a light is also included.

Donegan Optivisor – Rio Grande

For many years the only head loupe in the market was a Donegan head loupe made in USA.  These loupes are still the standard in head loupes and you will never go wrong buying a Donegan Optivisor.  Recently though the weakening Australian dollar has meant that this loupe now retails for about $120 in Australia.  Recently, like so many other tools, “knock offs” or copies, that are made in China, have appeared on the market.  To all intents and purposes, they are an exact copy of an Optivisor in both design and functionality.  In the favour of the copy is the price.  These can be purchased in Australia for around $60 and come packaged with 4 different lenses.  With Optivisor only 1 lens is provided but others can be purchased as required.  If this is still too much for you a copy of the acrylic head loupe with Velcro straps is available for about $20.

Other models can be purchased from places like Kogan or Jaycar.

Tiltable LED Headband – Kogan              LED Headband Loupe – Jaycar

Head Loupe with 4 Glass lenses – Gemcuts

A good head loupe will last a long time.  I have just replaced my original Optivisor bought in 1998.   After weighing up the options I went for the Chinese knock off from Gemcuts.  I can’t fault it and at $60 including 4 optical glass lenses is a great option for my failing eyesight.  Given that this investment will last you a long time, buy the best that you can afford at the time.

Filed Under: Cabbing, Faceting, Metalsmithing

More from Mary – Three Silver Bracelets

June 11, 2020 By Carol

by Mary Lancaster

(who at the time of sending this was almost out of silver wire and moving onto other creative activities).

Material
2.0mm round silver wire
2.0mm half-round wire (patterned)
Clasp
Makes: 28 x 8.5mm jump rings
28 x 7.0mm pattern jump rings
Length: 22cm
Material
1.5mm round silver wire
2.00mm flat (patterned)
1.2mm round silver wire (small links , hearts)
1.0mm round wire (twisted)
Clasp
Length: 21cm
Used left-over wire to make bracelet

Child’s Bracelet : Used left-over jump rings – Length: 13.5cm


Filed Under: Metalsmithing

Brushes

June 11, 2020 By Carol

by Carol Money

After some online shopping (jewellery related of course), I was recently given a free gift of the brushes displayed below. Although it is obvious what you would use some for, I have no idea of the recommended specialities of others and so am hoping for your suggestions.

Please add your comments in the corresponding numbered boxes below and I will post the results next week.

Your answers are completely anonymous, not even I will see who has responded.

What type of brush is used for what?

Filed Under: Metalsmithing

  • « Previous Page
  • 1
  • 2
  • 3
  • 4
  • 5
  • 6
  • Next Page »

Copyright 2014 · Website Design Brisbane

Insert/edit link

Enter the destination URL

Or link to existing content

    No search term specified. Showing recent items. Search or use up and down arrow keys to select an item.