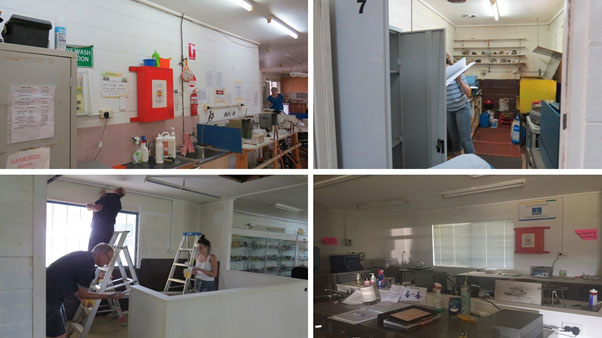
Always good to see members trying their hand at a new skill with great results. We recently had a Friday night work session with Thierry instructing some members new to cabbing.


We Dig Rocks
By Carol
Always good to see members trying their hand at a new skill with great results. We recently had a Friday night work session with Thierry instructing some members new to cabbing.
By Carol
Encouraging all enamellists
Katarina and I have been busy adding a little colour to the kiln corner, had any of you noticed?
We have made samples of all the opaque colours available in our stock, and will be working on the transparent range over the next few weeks.
by Carol Money
A little inspiration for any budding enamellists out there.
Some summery earrings I made to practise my piercing skills, that then just begged to be enamelled.
I used a clear flux enamel and then torched fired them, holding the heat on them after the enamel had melted to achieve the colour.
By Carol
Materials
Steps
By Carol
by Mary
I made this Figaro Necklace (5:1 links) for my daughter for 2019 Christmas. I had previously made one in silver and one in gold wire using round wire (Alternate Pattern 2). My current project is Alternate Pattern 1, using 3:1 links (round jump rings and twisted long links). The mandrels used are what I have available at home, these can be replaced with more consistent sizes at the Club if others want to create their own necklaces.
Materials
Steps
Materials
Steps
Using 1.00mm or 0.8mm round silver or gold round wire
Length: 56cm
□ Allow 1 m of round and square silver wire to make the necklace
By Carol
by (Woodworm) Christoph
Here are some things about petrified wood which get me excited….. well, not just wood, all permineralised plant material.
It all started in Germany where I was born in the town of Chemnitz, world famous for its Permian petrified forest and the local museum specialising in petrified wood from around the world and particularly in Permian flora.
As a child I always loved going into the Museum für Naturkunde Chemnitz. I was amazed by the fine detail of preservation right down into the cell structure. An ancient plant turned into rock. As I grew up I met a few collectors, called wood worms, and I was hooked even more. We went on field trips all over Europe and I still have a large collection over in Germany at my parents place.
Now how does petrified wood form?
Most importantly is that the wood is covered and locked away from oxygen, so it can’t rot away. In many cases petrified forests are links to volcanic activity. If things go right there is an eruption, which produces mostly ash and this ash will bury the forest. Over millions of years, minerals, predominantly quartz with other trace elements and metals will slowly impregnate the cell structure turning the wood into stone. This process is still not fully resolved.
The other way is wood gets buried by sediments such as sand. The process is the same, key is the presence of enough minerals to impregnate the wood. There have been cases that animal traces such as toredo borers (known as the famous peanut wood from the Kennedy ranges) or termites with their excrements (coprolites) have left their traces.
I’m more interested from a scientific angle of what species grew at which time, and how they have evolved through the evolution.
Petrified wood can actually be found on every continent. Yes, even Antarctica which was part of the super continent Gondwana.
There are some very famous petrified forests in the world such as the one in Arizona with its beautiful red petrified wood.
Or most exciting Araucaria cones from Argentina.
There is so much unknown still and only recently I have found a species of fern? which I haven’t found in the literature yet.
Australia has got a good diversity to offer from the Permian deposits in the Bowen basin to the well sought after Jurassic woods, Donpoxylon and ferns from central Queensland around Miles and Chinchilla and Lune River in Tasmania. Cretaceous peanut wood from WA and more recent tertiary opalisiert woods from Springsure. There are many more places to find it.
A good tip is the display in the Miles historical village. It houses the collection of former Norman Donpon, a mad collector which I was privileged to meet a few years ago.
Now I could go on and on about it …..
Below are a few more pieces from my collection.
By Carol
by Katarina
Now that you are planning in participating in the jewellery competition you are probably wondering how to close your necklace or bracelet – because yes, you have to make your own clasps.
Of course you could make your own lobster claw, box clasp or other fancy methods of keeping that necklace around your neck but unless you are a pro it will take as much time as it does to actually make the show piece.
But do not despair, help is at hand. There are some easier solutions: the S-Hook and the Toggle
S-Hook
A S-Hook is exactly that: wire bent into the shape of an “S” that will hook into a jump ring.
It is easy to make and fairly secure. And you can embellish it as much or as little as you wish: hammer it, texturing, wrapping, flattening.
The other side can be a simple jump ring or another S-hook, this time with the ends closed.
Here are a couple of videos showing how to make a simple S-Hook:
For a variety of s-hook samples – remember you have to make it – check this website Artbeads.com
A variation of the S-Hook is the simple hook and eye clasp. In essence it is half a s-hook with a jump ring.
For a range of these, check out this website Rings & Things.com
And remember, if you like the design of one type you should be able to adept it to the other style.
Toggle
The next type of clasp that you can make yourself is the toggle.
A toggle is a bar that can be threaded through a jump ring without falling out and therefore securing the necklace, and in fact bracelet securely. I like toggles because they are easier to use when closing a necklace. Less fumbly so to speak.
For a tutorial, check out this video:
The following gets you to one of my favourite websites with loads of good tutorials, this one for a toggle:
And here is another favorite of mine:
And if you want to see a whole raft of samples, simply google “handmade toggle clasp” or even better “artisan toggle clasp”.
And if all fails, ask one of your friendly silversmiths at the next table.
And I am sorry to say, at the moment you cannot access the library.
By Carol
by Carol Money
The Torque is made from 0.4 mm thickness copper sheet. The process involved first making a couple of wooden stakes to form the copper sheet, and then being very gentle with the hammering as the annealed copper was very soft. Soldering the long joint and forming the final shape using only your fingers was very satisfying.
Lastly I decided to colour it using the heat from the flame, this was lots of fun.
The design is not the best for either putting on and taking off or wearing, as the ends although rounded, still scrape my neck, and then it hangs a bit low, something to think about. It was however another great learning project.
By Carol
For the last couple of Friday nights work sessions, a couple of members have been learning to do a bezel setting.
The stones were fairly small, so fine silver bezel wire was used, with a bezel pusher to secure the stone and a burnishing tool to finish.
Sharon chose to add hers to a ring.
Lois chose to add a decorative band of silver ball wire and then make hers into a pendant, adding a bail.
By Carol
The Presidents Challenge is a group of four (4) competitions as follows.
Individual sheets for each competition will be posted in the next week or so.
Traditionally winners are announced at the Gem Show. In 2021 we may not have a Gem Show, but we can and should still have the Challenge.
COVID 19 RESTRICTIONS
Some members like to work on their entry’s at home others like to work at the Club. Because of the limitations imposed Covid 19 My intentions are to.
WORKSHOP DATES
I need some information from you so I can compile a list of workshop dates. Please send me the following as early as you can.
I urge you to enter, it could improve your skill level and hopefully you will enjoy the challenge.
Regards
Peter Smith
By Carol
by Ray Wilson for the Building Committee
About 3 years ago plans were formulated to improve safety around the soldering area, create a dedicated area for all of the hot working activities and consolidate the diamond saws into an area closer to the cabbing area and increase the power supply to 3 phase to ensure sustainable supply for the future.
In August 2019, the building committee started working on formal plans and drawings with a view to obtaining a grant to undertake the work. In early December 2019 we were advised that we had been successful in getting a $32,000 grant from the Brisbane City Council under their Building Stronger Communities program.
The work commenced in early January with members assisting in clearing out the areas ready for the building contractor. Around 20 members assisted in the project overall with clearing the site, painting, assembling furniture and re-establishing the work areas. The final part of the construction work – installing 3 phase power – was completed last week. There are still things to resolve and work out where they will finally be located ; like 24” saw and flat lap machines, but the majority of the project is now complete.
The collages below show the progress of the project with before, construction and fit out photos.
The removal of a wall has opened up the soldering area and now includes casting and enamelling equipment. The main corridor through the building is now clear of naked flames making it a safer environment for members.
From a corner in the cabbing room a dedicated saw room has been constructed which now houses all 4 trim and slabbing saws. This allows members who are using grinders to view the operation of the saws. The volume of traffic through the club has been reduced by having the saws proximate to the grinders.
We are appreciative of the support from the Brisbane City Council, our local Queensland government member and Patron Leanne Linard, our local BCC Ward Alderman Adam Allan and also of the many members who gave of their time to completing this project.